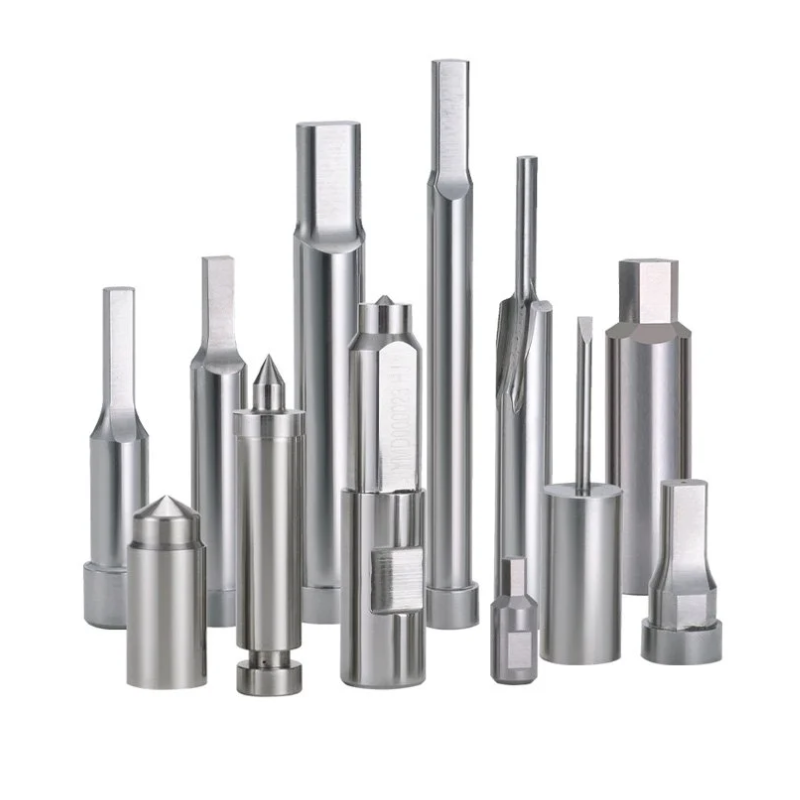
Punch wear is the gradual loss or deformation of material from the working surfaces of a stamping punch during repeated punching operations. It changes punch geometry, increases burr formation and cutting force, reduces dimensional accuracy, and eventually forces you to regrind or replace the tool.
Quick Answer: Punch wear is caused by a combination of clearance, material, geometry, lubrication, speed, and alignment. The most reliable signs are increasing burr height, dimensional drift, rounded cutting edges, higher punching force, and galling. Reduce wear by controlling clearance, selecting the right punch material, maintaining alignment, and regrinding before the edge radius exceeds 0.05–0.10 mm.
What Is Punch Wear?
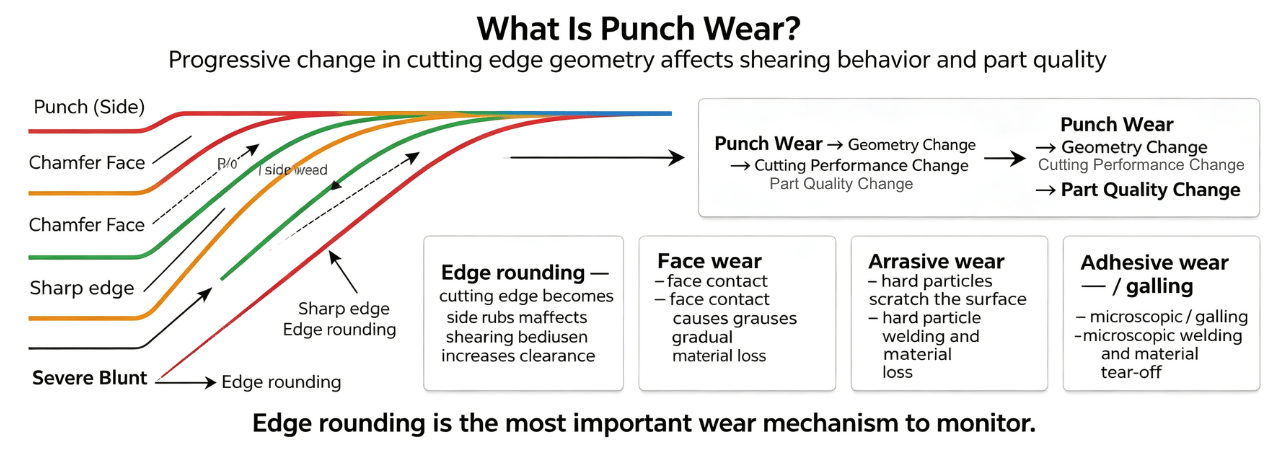
Punch wear is not a single event. It is a progressive change in the punch cutting edge and working surfaces that alters how the punch shears material.
The chain is straightforward:
Punch Wear → Geometry Change → Cutting Performance Change → Part Quality Change
Wear appears in several forms:
- Edge rounding: The cutting edge loses sharpness and becomes radiused. This is the most common and most impactful form of wear.
- Flank or side wear: The side of the punch rubs against the material, gradually losing material and increasing clearance.
- Face wear: The punch face contacts the sheet on every stroke, leading to gradual material loss or deformation.
- Abrasive wear: Hard particles in the workpiece material scratch and erode the punch surface.
- Adhesive wear (galling): Microscopic welding occurs between the punch and sheet at high-pressure contact points. When the punch withdraws, it tears away small fragments of tool material.
Edge rounding is the most important wear mechanism to monitor because it directly changes the shearing behavior. As the edge rounds, the punch must penetrate deeper before fracture begins, which increases force and changes the cut edge profile.
What Causes Punch Wear?
Punch wear rarely has a single cause. In most tooling rooms, it is a combination of several factors. The list below is ordered by how often we see each issue in practice.
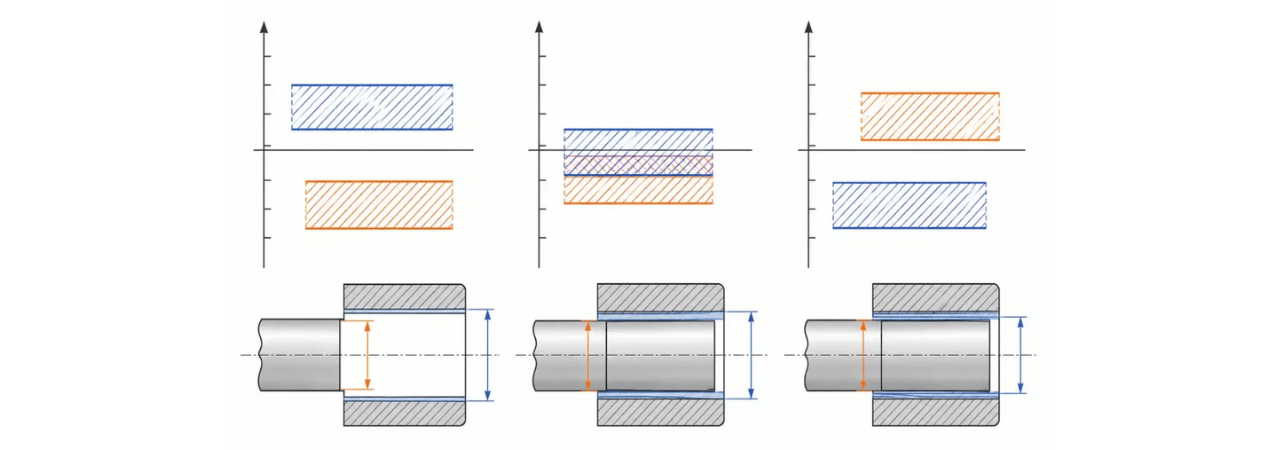
1. Incorrect Punch and Die Clearance
Clearance is the most common root cause of premature wear. Too-small clearance increases friction on the punch side and accelerates edge rounding. Too-large clearance allows the material to fracture unevenly, creating lateral forces that wear the punch unevenly. Uneven clearance on one side creates localized wear that is often mistaken for a material problem.
If clearance is the suspected cause, start with the calculation method in our Punch Clearance Guide and verify per-side clearance for your material and thickness.
2. Punch Material
Hardness alone does not determine wear resistance. A punch that is too hard may resist abrasive wear but chip under impact. A punch that is too soft will deform and round quickly. The right balance depends on the workpiece material, thickness, and production volume.
HSS punches generally offer a good balance of toughness and wear resistance for general stamping. Carbide punches provide better wear resistance in high-volume or abrasive applications but are more brittle. The selection logic is covered in detail in our Punch Material Selection Guide.
3. Material Being Punched
The workpiece material directly affects wear rate. Harder, stronger, and more abrasive materials accelerate punch wear. Stainless steel and high-strength steels are significantly more aggressive than mild steel. Thicker material also increases contact pressure and sliding distance, both of which increase wear.
4. Punch Geometry
Small punches, narrow sections, and sharp corners concentrate stress and wear. A punch with a sharp internal corner has a much higher wear rate at that corner than a punch with a generous radius. In practice, adding a small radius to the cutting edge (0.001–0.002 in. / 0.025–0.05 mm) can reduce edge stress and extend life. For punches with small working sections, a Stepped Punch can provide a larger supporting body while maintaining a small working tip, reducing deflection and localized wear.
5. Lubrication
Insufficient or incorrect lubrication increases friction and heat at the punch-sheet interface. This accelerates both abrasive and adhesive wear. Galling becomes much more likely when lubrication is inadequate.
6. Punching Speed
Higher punching speeds increase friction heat. In extreme cases, this heat can soften the punch surface locally, reducing hardness and accelerating wear. Speed-related wear is more common in high-speed progressive dies than in low-speed operations.
7. Misalignment
If the punch and die are not properly aligned, the clearance becomes uneven around the punch circumference. This creates a lateral force that pushes the punch to one side. The result is localized wear on one side of the punch, often accompanied by galling and dimensional drift. Misalignment wear is frequently misdiagnosed as a material problem.
What Are the Signs of Punch Wear?
The most reliable way to detect wear is to monitor the symptoms, not wait for the punch to fail. These are the signs that matter most:
| Sign | What It Indicates |
|---|---|
| Burr height increases gradually | The cutting edge is rounding; shearing is no longer clean |
| Hole dimensions drift | The punch diameter or cutting behavior has changed |
| Cutting edge becomes visibly rounded | Edge rounding has progressed beyond the effective cutting condition |
| Punching force increases | The punch needs more force to shear, often due to a dull edge |
| Surface quality deteriorates | Fracture zone changes; tearing or rougher shear surface appears |
| Slugs show abnormal fracture | The material is not separating cleanly |
| Punch starts galling | Adhesive wear is developing; material is sticking to the punch |
| Punch edge begins to chip | Wear has progressed to the point where impact stress exceeds local strength |
Burr height is often the single most practical indicator. A commonly used threshold is: acceptable below 10% of material thickness; warning at 10–15%; critical above 15% and replace immediately. Edge radius can also be measured with an optical comparator; regrinding is generally overdue once the radius exceeds 0.05–0.10 mm.
How Does Punch Wear Affect Stamping Quality?
Punch wear does not just affect the punch. It changes the entire shearing process and the resulting part.
Punch Wear → Punch Geometry Changes → Shearing Behavior Changes → Burr / Fracture / Hole Quality Changes → Dimensional Accuracy Changes
As the cutting edge rounds, the material must be penetrated deeper before fracture initiates. This produces a larger burnished zone and a different fracture profile. Burr height increases, and the sheared edge becomes rougher. Hole dimensions can drift beyond tolerance. In progressive dies, increased burr height can also interfere with feeding and cause misfeeds.
Punch Wear vs. Punch Breakage
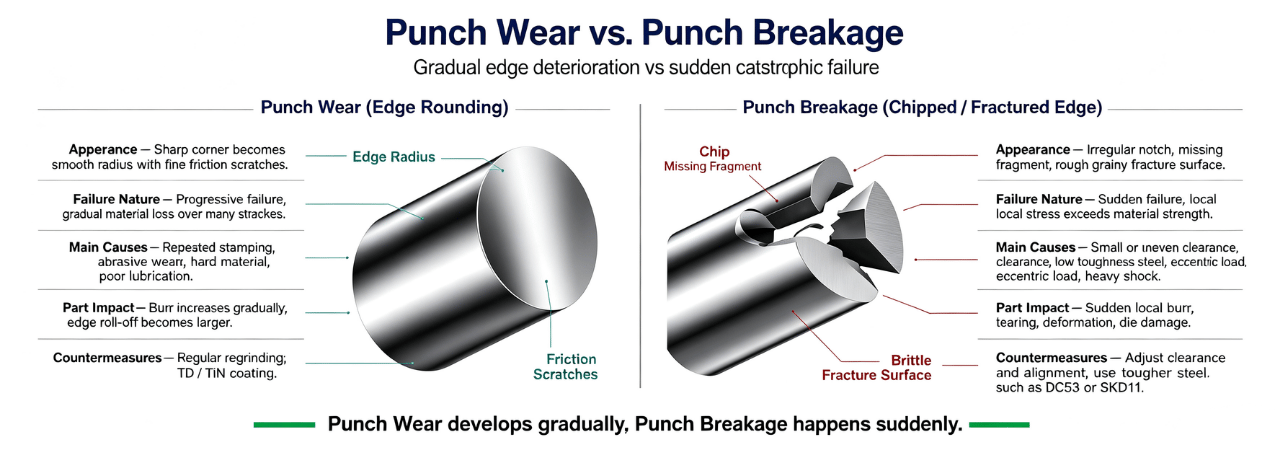
Wear and breakage are often confused, but they are different failure modes.
| Punch Wear | Punch Breakage | |
|---|---|---|
| Nature | Progressive, gradual | Sudden, catastrophic |
| Cause | Abrasion, adhesion, edge rounding | Overload, impact, brittle fracture, misalignment |
| Warning signs | Burr increase, dimensional drift, force increase | Often none before failure |
| Result | Gradual quality decline, regrind needed | Immediate tool damage, production stop |
Wear can contribute to breakage over time because a worn punch is more sensitive to impact stress. But the two should be diagnosed separately. If your punch broke, the root cause is often overload, misalignment, or material brittleness—not wear alone.
How to Reduce Punch Wear
The reduction strategy follows directly from the causes. In priority order:
1. Control clearance. Verify per-side clearance for your material and thickness. Uneven clearance is worse than a slightly incorrect uniform clearance. See the Punch Clearance Guide for calculation.
2. Select the right punch material. Match hardness and toughness to the workpiece material and production volume. See the Punch Material Selection Guide for failure-mode-based selection.
3. Maintain proper alignment. Check punch-to-die alignment regularly. Uneven wear on one side of the punch is usually an alignment problem, not a material problem.
4. Use appropriate lubrication. The lubricant must match the workpiece material and the severity of the operation. Inadequate lubrication accelerates both abrasive and adhesive wear.
5. Control punching speed. If you are running high-speed operations, monitor punch temperature and check for signs of softening or accelerated wear.
6. Inspect punch geometry regularly. Check edge condition with a magnifier or optical comparator. Watch for edge rounding, galling, and uneven wear patterns.
7. Regrind at the right time. Do not wait until the punch fails. Regrind when burr height reaches the warning zone or edge radius approaches 0.05–0.10 mm. Removing 0.05–0.15 mm per regrind is a common practice.
8. Address the tooling design. Sharp corners, small cross-sections, and long unsupported sections all accelerate wear. A punch tooling design and manufacturing review can identify geometry changes that reduce stress concentration and extend life.
When Should a Punch Be Reground or Replaced?
Punch life is not a fixed number. It depends on material, thickness, clearance, speed, lubrication, and the required part quality. Rather than using a fixed stroke count, monitor these indicators:
| Indicator | Action |
|---|---|
| Burr height reaches 10–15% of material thickness | Schedule regrind |
| Edge radius exceeds 0.05–0.10 mm | Regrind overdue |
| Galling or material pickup appears | Regrind and check lubrication |
| Dimensional drift beyond tolerance | Evaluate punch condition; may need replacement |
| Visible chips or cracks | Replace |
| Punch length reduced by ~20% after multiple regrinds | Replace |
A punch can typically be reground 3–5 times before replacement, depending on the design and the amount removed each time. The key is to regrind before wear becomes severe. Once the wear is deep or the edge is chipped, regrinding may no longer be viable, and the punch must be replaced. Running a worn punch also accelerates wear in the die and other tooling components.
FAQ
What causes a punch to wear out quickly?
The most common causes are incorrect clearance, wrong punch material for the application, misalignment, insufficient lubrication, and abrasive workpiece material. In many cases, two or more of these factors combine.
How do I know if my punch is worn?
Increasing burr height, dimensional drift, higher punching force, a rounded cutting edge, and galling are the most reliable signs. Burr height is often the easiest indicator to monitor.
Is punch wear the same as punch breakage?
No. Wear is progressive and gradual; breakage is sudden. Wear can contribute to breakage, but they have different causes and different solutions.
How often should I regrind a punch?
There is no fixed interval. Regrind when burr height reaches 10–15% of material thickness, or when the edge radius approaches 0.05–0.10 mm. Monitor your specific operation and adjust based on actual performance.
Can I reduce punch wear without changing the material?
Yes. Correct clearance, proper alignment, adequate lubrication, and timely regrinding can significantly extend punch life even with the same material.
What is the best way to prevent adhesive wear (galling)?
Adhesive wear is best controlled by reducing friction—through proper lubrication, surface treatment, or adjusting hardness. A slight reduction in hardness can sometimes improve toughness and reduce galling, but this is a balance that depends on the application.
Get Help with Punch Wear and Tool Life
If you are dealing with punch wear, the right starting point is to identify the failure mode—not just replace the punch. HTX Precision manufactures Punch Components in HSS, carbide, and tungsten carbide for different stamping conditions. For high-wear applications, Carbide Punches and Tungsten Carbide Punches offer better wear resistance. For general stamping, HSS Punches provide a balanced combination of toughness and wear resistance.
Send us your punch drawing or application details, including material, thickness, and the wear pattern you are seeing. We will review the conditions and recommend a punch configuration that reduces wear and extends tool life.